I've been maintaining FX Experience for a really long time now, and I love hearing from people who enjoy my weekly links roundup. One thing I've noticed recently is that maintaining two sites (FX Experience and JonathanGiles.net) takes more time than ideal, and splits the audience up. Therefore, FX Experience will become read-only for new blog posts, but weekly posts will continue to be published on JonathanGiles.net. If you follow @FXExperience on Twitter, I suggest you also follow @JonathanGiles. This is not the end - just a consolidation of my online presence to make my life a little easier!
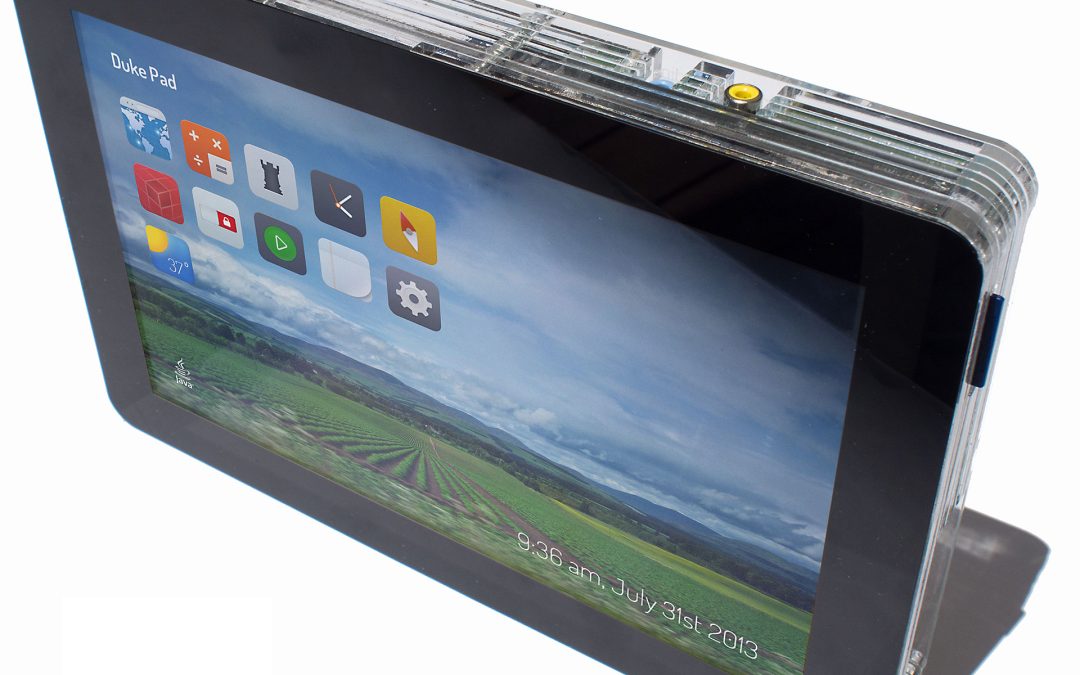
At the JavaOne technical keynote just now Richard and Jasper introduced the DukePad – a custom built tablet device powered by a Raspberry Pi and featuring a touch screen, camera, HDMI output, GPIO pins, and more. It is powered with Java and has a custom-built JavaFX user interface.
The DukePad is a Do-It-Yourself, make-at-home tablet computer based on the Raspberry PI and JavaSE Embedded 8. The plans and instructions for building the DukePad are available here, and we’re working with suppliers to make available pre-made kits that can be more easily assembled. The software on the DukePad uses Raspbian Linux as the operating system, and an OSGi-based JavaFX environment. Within this DukePad environment, apps are simple JavaFX OSGi Modules.
Click for bigger image
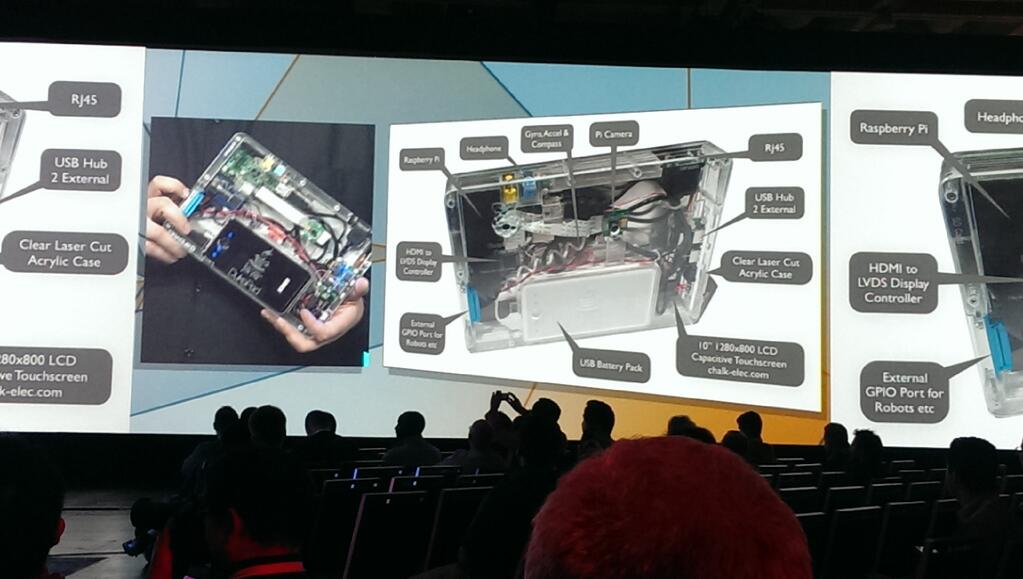
The DukePad is not a product, it is an open source, freely available set of plans and software for assembling your own tablet using off the shelf components. As such, the quality of the DukePad software environment is demo-quality (although we did strive to write as much real functionality as we could, the realities of demo presentations requires sacrificing time on parts of the applications that are not going to be shown, in favor of smoothing out those parts that will be shown). The code is hosted in the OpenJFX repositories under apps/experiments/DukePad. We hope to see forks of this code (GitHub, BitBucket, whatever you like best) and lots of experimentation and improvement that can be shared.
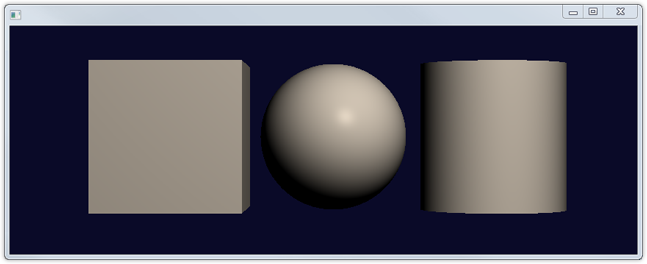
If you came to JavaOne 2012 or watched they keynote online you would have seen a cool proof of concept we did along with Canoo and Navis. In case you missed it, its on YouTube:
It was built on a early JavaFX prototype with added 3D mesh, Camera and Lighting support. The first public build of JavaFX 8 with the official support for this is now out for you to download, yay!
Download Java 8 EA b77 (including 3D) …
At the moment there is only support for Windows but a OpenGL version for other platforms is being worked on.
Now that JavaOne is over and everyone finally has a chance to exhale, it’s time to start blogging about all the stuff we talked about. For my part, I’m hoping to blog about a bunch of stuff that I covered in my two sessions (primarily TableView cell spanning, RangeSlider, Rating, SegmentedButton and whatever else I can find on my machine). For today, lets talk about adding cell spanning support to TableView. Just a quick pro tip: for those of you who just want a jar and don’t care about how cell spanning was developed, you might want to skip to the end of this post…
So, I need to start this post as per usual – this is not a product of Oracle – there is no support contract or guarantee that this code won’t format your hard drive or do something equally nefarious. Please act responsibly for your personal circumstances. Finally, if you do find something wrong (API, documentation, bug, etc), please email me and lets improve it!
With that out of the way, what exactly is cell spanning (and how does it differ from cell merging)? My understanding (and correct me if I’m wrong) is that cell spanning is when the cell at the ‘spanned index’ takes over the full area of the span, whereas in cell merging you essentially take the content of all cells in the span area and merge them into a single cell taking up the area. In other words, the cell will be the same size regardless of whether spanning or merging is used, and it is simply a question of where does the data come from in either case. My preference is cell spanning over cell merging, so that is what I’ve implemented in this blog post.
To make things even clearer, I guess I should clarify what I mean by the ‘spanned index’. What I mean is that, essentially, we continue to layout our TableView in the same way as we always do (TableRow by TableRow (top to bottom), with each TableRow laying out each TableCell within it (left to right)). As we’re doing this layout, we are basically doing what I show in the code fragment below (although I should note this is pseudocode – things are somewhat more complex internally). The ‘spanned index’ is basically the combination of row/column index as we do the layout. In other words, the value in a spanned cell is the row/column index at the ‘top-left’ of the spanned cell area. This means that all other values that are in row/column indices that are overlapped due to a span will be lost. Here’s the pseudocode:
for (int row = 0; row < maxRows; row++) {
// start laying out a new TableRow.
// We do this by laying out each column in the row.
for (int column = 0; column < maxColumns; column++) {
// laying out each column
}
}
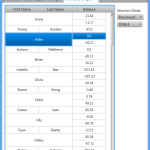
Now we’ve covered a bit of theory, I guess we better cover what exactly the end result is. Here’s a few screenshots below – click on them for the full-sized version.
Please excuse the actual data used in the screenshots – I paid precisely zero minutes preparing the demo data – I just used what I had on hand. Clearly what I am doing in the demo data makes no sense for cell spanning – please use your imagination (and ideally send me a better sample data set to use for improved screenshots). 🙂
To support cell spanning support, the first new class is the CellSpanTableView. It simply extends TableView and adds support for a SpanModel. SpanModel is defined as such:
public interface SpanModel {
// cell spanning is only run when isCellSpanEnabled() returns true.
public boolean isCellSpanEnabled();

// Returns the CellSpan for the given row/column index.
public CellSpan getCellSpanAt(int rowIndex, int columnIndex);
}
The CellSpan class is (presently) quite simple, it is a final class with two immutable fields representing the amount of spanning that should occur in the horizontal and vertical directions. I should note that a rowSpan (or columnSpan) of one simply means that there is no spanning of multiple rows / columns – it is just the default layout. Here it is in its full glory:
public final class CellSpan {
private final int rowSpan;
private final int columnSpan;

public CellSpan(int rowSpan, int columnSpan) {
this.rowSpan = rowSpan;
this.columnSpan = columnSpan;
}

public int getRowSpan() {
return rowSpan;
}

public int getColumnSpan() {
return columnSpan;
}
}
Therefore, with this API you should do something like the following when creating your own CellSpanTableView instance:
CellSpanTableView cellSpanTableView = ...;

cellSpanTableView.setSpanModel(new SpanModel() {
private final CellSpan spanTwoRows = new CellSpan(2, 1);

@Override public CellSpan getCellSpanAt(int rowIndex, int columnIndex) {
return rowIndex % 3 == 0 && columnIndex == 1 ? spanTwoRows : null;
}

@Override public boolean isCellSpanEnabled() {
return true;
}
});
Note that all the magic happens in the getCellSpanAt method – for the given row / column indices, you need to tell the SpanModel what the cell span is. If you return null, you are saying there is no spanning required. In the code above, we span two rows whenever the row index is cleanly divisible by three, and we’re looking at the ‘first’ column. This gets you the result shown in the first screenshot above. I have already heard some requests to improve this API – if you have any strong feelings please let me know!
To achieve the new layout, there is a small number of code changes that need to go into the backend of TableView. Because this post is already quite long I won’t bother to talk about that here – if people are interested I will do another post. Needless to say, the code is included in the links below, but it is definitely a proof of concept, not a final implementation!
Another important point to make is that you should definitely join the cell spanning discussion on Jira at RT-24747 – this is where I would appreciate people post feedback on the API. I already know there are a few things to improve (particularly related to what should be passed to the user in the CellSpan.getCellSpanAt(…) method).
Ok, with all that covered, you can download a zip file that contains both the source and a precompiled jar file. Note that these will only work with the JavaFX 8.0 developer preview releases – they use API that is not available in JavaFX 2.2. It is trivial enough to backport though, and if someone does I will happily host the source code and jar file here.
In summary – lets get the discussion around cell spanning started! I look forward to your comments 🙂
Over the last month we built 5 kiosks for JavaOne (1 prototype and 4 production). The idea was to show Java SE Embedded and JavaFX running on a small embedded device as a Kiosk with a great UI to help people plan their JavaOne schedule. One was shown in the Technical Keynote and the 4 production ones were then placed in the Hilton, Parc 55 and Nikko hotels of JavaOne. This is the story of how they were made…
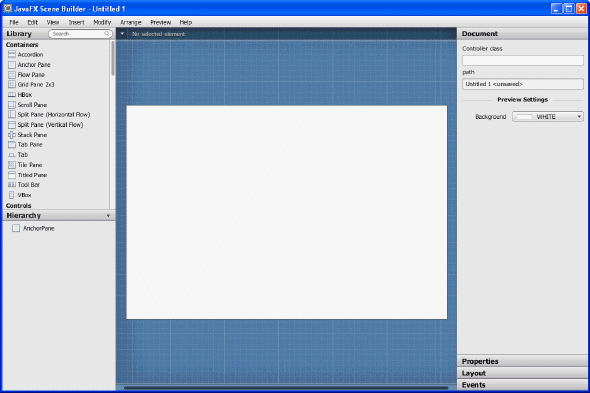
Hello from JavaOne Japan, where Jasper, Jonathan and I find ourselves seated in the opening keynote of the morning. One of the big announcements is the public beta of the JavaFX Scene Builder, our new tool for laying out and creating JavaFX content. The Scene Builder is the start of a more comprehensive RAD (rapid application development) tool for JavaFX, with drag-and-drop GUI building and eventually data binding. (more…)
I’ve just returned back from three weeks in the US, and one thing I was asked very frequently during JavaOne was if I’d be making my slides available. It turns out that I don’t even need to upload the slides manually this year – Oracle has put them all up online already. If you want to find slides for (I assume) any of the JavaOne sessions, you can search the content catalog.
However, for those interested in my sessions, the three talks I gave were the following:
UI Controls and Charts: Drag-and-Drop, Filtering, Sorting, Table Hookup with Charts.
Paru Somashekar and Jonathan Giles. Download slides.
JavaFX Datasources: Getting Real-World Data into JavaFX Controls.
Johan Vos and Jonathan Giles. Download slides. For more information, visit the DataFX website.
Custom UI Controls and Charts with JavaFX 2.0.
Jasper Potts and Jonathan Giles. Download slides.